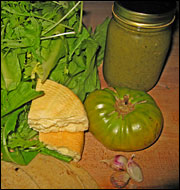
On a recent trip to the farmers market, I found a mountain of leafy greens of all different hues and textures. I couldn’t resist buying four varieties: rainbow chard, red Russian kale, an Asian green similar to spinach, and escarole. Cooler weather also means the arrival of cooler-weather herbs like cilantro, and I tucked a bunch into my market basket too.
Later in the week, when it was time to make dinner, I surveyed the contents of the refrigerator and the pantry. I realized I’d gotten a little carried away buying greens, so I knew I’d need to make a dish that used a lot of them.
Many of my friends want to shop at the farmers market, but they complain that they end up with drawers of rotting produce. It’s a common problem with an easy solution: a well-stocked pantry.
Shopping at a farmers market means access to bounty, but it also means accepting limits: the limits of what your region produces and what your culture supports. But within those limits, serious pleasure and depth are possible. If you don’t understand what I mean, taste a tomato in February and then one in July. This is not about Puritanism or being a good person — this is about pleasure, and the comfort of geographic and social bonds that you simply can’t find elsewhere.
A good pantry does not need to be huge or expensive. But it does need to be smart, and you need to understand how it works. If you feel like a beginner, it’s best to keep it simple and look to local traditions as a guide. Here’s a look at what’s in my pantry, along with a few pointers and thoughts on how these ingredients can help you turn market goods into good eats.
- Bulk grains. Cornmeal, whole wheat flour, Carolina gold rice, grits. Regional grain production has largely been displaced by modern monocropping, but due to increased demand, it is resurfacing. Tell your local farmers you’re interested in buying local grains if they aren’t currently available. Grains provide the backbone of the meal and provide some general continuity through seasons. You need to be able to master a few dishes based on them without thinking about it. Whether it’s knowing how to crank out good cornbread, making perfect rice, or even knowing where to buy a reliably good baguette, make this your first step.
- Fat. Bacon or salt pork, lard, and butter are traditional in my region; a local project to produce mechanically pressed sunflower oil is in the works. I love extra virgin olive oil, but I try to reserve it for when its flavor really shines. Health-conscious folks all over the world have traded in their native cooking fat for olive oil, but recent evidence suggests that a wide variety of natural fats are healthful in moderation. Plus, every fat has a characteristic flavor and texture, which complement different vegetables and cooking techniques. I love the crispy crusts lard produces in cornbread and savory tart crusts. If you’ve mastered grains, take some time to experiment with one or two locally produced fat alternatives.
- Eggs from pastured chickens not only find obvious uses at breakfast and in baking but form the basis for simple suppers of seasonal vegetable quiches or frittatas.
- Dairy. Milk, cream, and buttermilk, as well as farmstead cow’s milk and goat milk cheeses. Beyond the basics, a few favorite versatile cheeses quickly turn salads into meals, and vegetable side dishes into the main event. Smoked cheeses add meaty, satisfying flavor to a variety of dishes.
- Sweeteners. Local honey and regionally produced sorghum molasses are what I use for tea and toast or drizzled over goat cheese or yogurt, as well as for bread dough or vinaigrettes.
- Meat. Pastured poultry and pork, grass-fed beef and lamb. In the past two to three years, local meat and poultry production has boomed in my community. I eat a vegetable-centered diet, but now that I can buy humanely and sustainably raised meat and poultry, I am incorporating meat again. I love to roast whole chickens, which make three to four meals for two people. We’ll have roasted chicken and vegetables one night, chicken salad for lunches, then use the carcass to make a flavorful soup with escarole and parsley.
- Spices and herbs. My advice for spicing foods is to keep it simple — you can go a long way with salt and pepper. A few fresh herbs within arm’s reach will greatly improve your cooking, but other than bay leaves, I am not a fan of dried herbs. Cumin and coriander seed are the only spices that I use frequently, mostly in bean dishes. I usually buy these spices, but this year at my community garden we harvested coriander seed from our cilantro plants after they bolted.
- Vinegars. I’m a sucker for lemons, limes, and vinegars, which I frequently use in vinaigrettes and to add bright flavor to dishes like sautéed greens. Vinegar is not hard to make: Set aside a bottle of wine with the cap loosely on. Check after three to four weeks. When it smells and tastes like vinegar, it is. (Remember, you should never use homemade vinegar in canning, because it may not be acidic enough to keep bacteria in check.) I also use juice from homemade fermented pickles in place of vinegar.
- “Put up” food. I put up blanched tomatoes and roasted peppers in the freezer to turn into quick soups or sauces through the winter. I can use a simple tomato sauce to make “no brainer” meals of pasta throughout the year. Salsa verde made with green tomatoes turns leftover roasted chicken into taco or enchilada filling. I put up relishes, chutneys, and fermented vegetables — like hot peppers, sauerkraut, and Korean kimchi — to add pizzazz to otherwise simple meals of rice or cornbread and beans. Even if you are wary of canning food, I encourage you to at least take advantage of your time by making double batches of sauces and soups. Eat some now; freeze some for later. Investing some time up front can lead to lots of easy meals down the road.

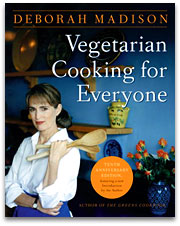
Vegetarian Cooking for Everyone, by Deborah Madison
Mastering the Fundamentals
Other than a well-stocked pantry, you need to master some simple cooking fundamentals: seasoning, sautéing, roasting, blanching, and broiling. As far as recipes go, it’s best to master a few with endless variations; soups, pasta, frittatas, tacos, open-faced sandwiches with salads, and simple vegetable plates are forms that I regularly use. Try to rely on one cookbook for advice on particular ingredients and culinary technique. For me that book is Deborah Madison’s Vegetarian Cooking for Everyone. I turn to it for inspiration when I get tired of staring blankly at the butternut squash on my countertop.
The last necessity of transitioning to market-inspired cooking is assembling allies. Your allies may be friends or family members who are good cooks, your favorite vendors who provide you with cooking tips while your shop, or a canning buddy. There is no better way to learn how to cook than to watch those who can.
So back to that evening when I’m staring at too many greens. In the pantry, the salsa verde that I put up two weeks ago looks good to me. I think of my husband’s favorite dish of spinach enchiladas at our local Mexican restaurant. I’ve never made them, but I think they’ll be even more satisfying with my hearty mix of greens, homemade salsa verde, smoked farmer’s cheese, and homemade crème fraîche. I send Phil out to grab some tortillas while I get to work.
Enchiladas Verde with Greens, Cheese, and Cultured Cream
2-3 bunches of greens (about 2 1/2 pounds) — kale, chard, collards, mustard greens, spinach, etc.
4 garlic cloves, chopped
Salt
3 tablespoons butter or vegetable oil
8 ounces cheese — pretty much anything will work, but I chose smoked farmer’s cheese for the meaty quality it brings to the dish
Cultured cream (recipe below) — you can use Mexican style crema or sour cream, but I like to make my own version with cream from my local dairy
Radishes, cilantro, and lime for garnish
Preheat oven to 400 degrees F.
Bring a large pot of salted water to a boil. Remove the tough stems from the greens and add the greens to the water in three batches and blanch for 15 seconds to two minutes depending on toughness. Spinach will take only seconds, collards a few minutes. Remove the greens with a slotted spoon or tongs and plunge in ice water. Squeeze out the excess water and chop the greens.
In a large sauté pan, melt the butter and sauté the garlic until golden with a pinch of salt. Add the greens and toss to coat in butter. Cook for two minutes until some of the water is evaporated. Set aside.
Traditionally tortillas are softened by frying them in hot oil for a few minutes before assembling the enchiladas. I like to take an easier and healthier approach and heat the tortillas over the open flame of my gas stove with tongs, about 15 seconds on each side. You can also steam the tortillas for a few seconds or wrap them in a clean, damp towel and microwave them for one minute.
Transfer your tortillas to your work surface. Fill each with 1/2 cup of sautéed greens and roll up.
Place the enchiladas seam side down in a single layer across the bottom of a casserole dish. Top with 2 cups of salsa verde (see below) and crumbled cheese. Bake for 20 minutes until the cheese begins to brown and the sauce is bubbly.
Drizzle with Mexican crema or your own homemade cultured cream and top with thinly sliced radishes and torn cilantro. Serve hot with refried beans.
Green Tomato Salsa Verde, Now and Later

This is a salsa verde recipe adapted to make use of the loads of green tomatoes left hanging on the vines, refusing to ripen this time of year. Of course, you can also use the traditional tomatillo. I like to can at least a dozen jars of this delicious green tomato salsa to last the whole year. To do the same, just multiply the recipe. (Makes 2 pints)
1 medium white onion
4-6 cloves raw garlic
10-14 fresh jalapeños or your favorite green chiles (if you prefer milder salsa, try poblanos or Anaheim chiles), stems removed
1 bunch cilantro
Juice of 2 limes
Salt to taste or about 2 teaspoons
Water, if thinner consistency is desired
In a cast iron skillet or under the broiler, cook the tomatoes, onion, garlic, and chiles, turning frequently, until they begin to blacken all over and are soft. The garlic will likely be ready before everything else. Alternatively, you can boil the first four ingredients in salted water for 10-15 minutes until the tomatoes are soft and squishy. Next, transfer all to a food processor or blender and allow to cool for 10 minutes. Add the cilantro, salt, and lime and process into a coarse purée.
Thin with several tablespoons of water if a thinner salsa is desired.
Use immediately, refrigerate for up to two weeks, or freeze for up to six months. To can, ladle salsa into sterilized pint jars leaving 1/4 inch of head space; top with clean and sterilized two-piece lids. Process in a boiling water bath for 20 minutes. Store in a cool, dark place.
Cultured Cream
This cream is similar to the both Mexican crema and French crème fraîche. Not as thick or as sour as American sour cream, it is delicious and easy to make.
2 tablespoons buttermilk
Place cream in a clean jar or container and stir in the buttermilk. Loosely cover and set aside at warm room temperature for 24 hours or until thickened. Stir to combine and store in the refrigerator for several weeks.


