I’m not really against food coloring, but I’ll happily go the natural route when possible. There are so many amazing colors in food — so why not use them? There are some brands that are now selling natural food colorings, but I love to DIY.
There are a few points to keep in mind if you want to try it yourself at home.
1. Choose the source of color
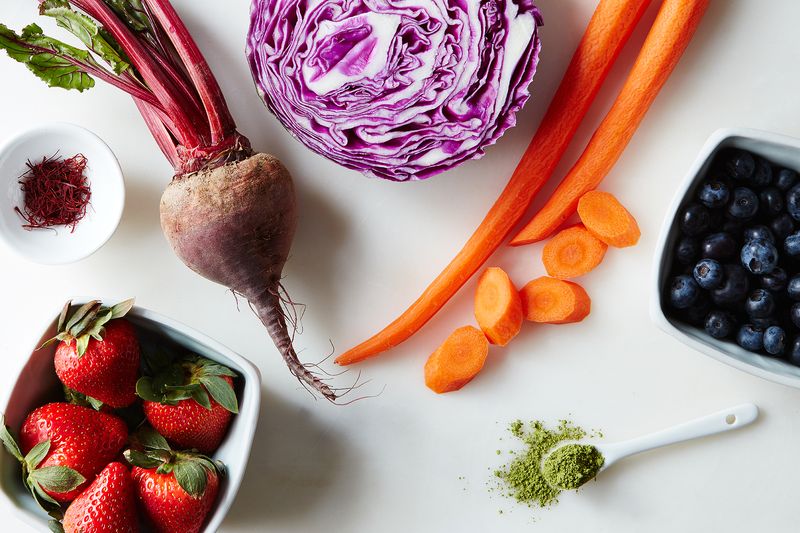
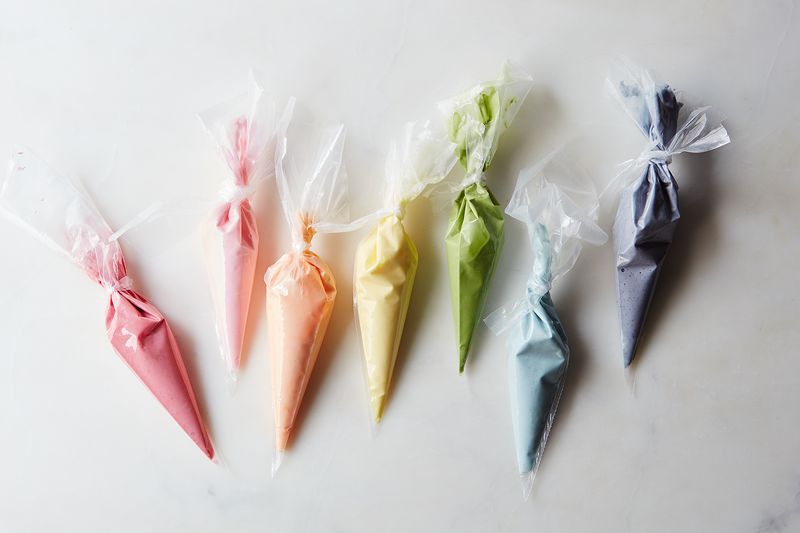
Sources for natural colorings can be found all over the place, and many may already be in your pantry or fridge! More about how exactly to turn these ingredients into food coloring below, but here’s how you can make certain colors (the ingredients I used to make the colors you see in this post are in bold).
- Pink: strawberries, raspberries
- Red: beets, tomato
- Orange: carrots, paprika, sweet potato
- Yellow: saffron, turmeric
- Green: matcha, spinach
- Blue: red cabbage + baking soda
- Purple: blueberries, purple sweet potato
- Brown: coffee, tea, cocoa
- Black: activated charcoal, squid ink
Food52/Mark Weinberg
2. Consider the flavor
One thing that natural food colors have that commercial colors don’t is taste. Because the color comes from real food ingredients, a small amount of flavor will remain in the final icing. The more color you add to the frosting, the more it’s going to taste like that ingredient. This may not matter much for ingredients like fruit, matcha, coffee, or cocoa, which have flavors commonly used in baking, but it makes things tricky for ingredients like turmeric, squid ink, and spinach.
Food52/Mark Weinberg
3. Keep your expectations reasonable
The challenging thing about using naturally occurring colors is that they aren’t as intense as commercial colors. The first piece of advice is just to accept that off the bat: Your red won’t be really red, but the colors have unique tints all their own. The key to achieving the most vibrant color is to start with as concentrated of a base as possible.
While you won’t be able to achieve colors quite as intense, the goal with DIY colorings is to make them as opaque (read: intense) as possible from the get-go for the best results when you use them.

Food52/Mark Weinberg
4. Understand powder bases versus liquid bases
There are two ways to make DIY food colorings: powders and concentrated liquids. Powders are the easiest way to make DIY food colorings because they dissolve easily and are already somewhat concentrated, meaning they can lead to more intense color. You can purchase many fruits and vegetables in powdered form, or you can make your own by buying freeze-dried fruits and vegetables and pulverizing them to a fine powder in a food processor or spice grinder. Some ingredients — like cocoa, coffee, tea, and spices — are naturally in powdered form and you can add these directly to a frosting. Depending on the ingredient, this can lead to slightly clumpy results, so you may want to dissolve them in a small amount of liquid (milk, water, etc.) beforehand.
The second way is to make a concentrated liquid. The liquid can be pure juice, a strained purée, or water-based:
- If you have a juicer, use it. It produces the purest liquid that you can reduce to the proper consistency.
- Pureés are also good, though they may contain some solids (you can always strain it), and a thicker final liquid. I made a purée for the blueberry-based coloring by bringing the blueberries to a simmer, puréeing with an immersion blender, then straining the purée.
- The water method isn’t the best, but it’s the best way to get color from certain ingredients that need to be infused (for the saffron coloring, I infused the saffron in warm water).
Whatever method you use to make a liquid base, you always have to reduce it. When you reduce a liquid, water evaporates — this basically ensures you’re ending up with as concentrated a color as possible and getting rid of excess water that could negatively affect the recipe you’re adding it to. I reduce liquids until I’ve reached about 1/4 cup.
5. Know that heat can play a role
I usually use these natural food colorings in cold applications, to tint frostings, icings, and glazes. It should be noted that while many of these food colorings could successfully tint baked goods, like cookie dough or cake batter, heat can be an impeding factor, as many of these colors can change when exposed to heat, becoming duller or browner.
It should also be noted that the food colorings themselves should be cooled completely before you add them to any recipe.
Food52/Mark Weinberg
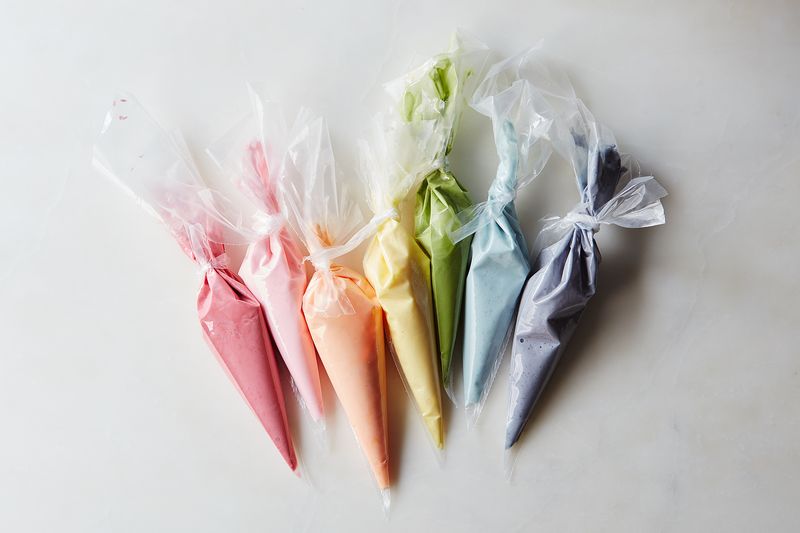
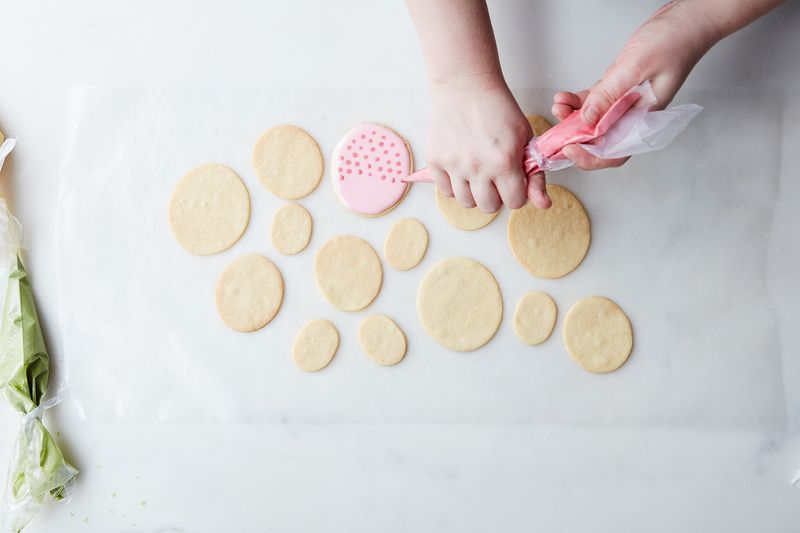
6. Add to frosting, then decorate!
Once you’ve made your food colorings, all you have to do is add them to frosting! Just like with traditional food colorings, it’s best to add the color in small amounts gradually until you achieve the color you want. Keep in mind that you can add more powdered coloring than liquid coloring without affecting the recipe.
I love to use these natural colorings to tint royal icing, which I then use to decorate cookies! I decorated these Easter egg cookies (with Amanda Hesser’s sugar cookie recipe) using the flooding technique. You can do it plain, or add simple patterns like dots or stripes. If you add the dots or stripes while the flooded icing is still wet, it will appear flat when dried. If you add the dots or stripes once the bottom layer of icing is dried, you’ll get a more textured effect. If you want to get really fancy, try some of Alice’s marbling techniques to make some stunners.

Food52/Mark Weinberg
For the natural dyes:
- Pink: Add one to two teaspoons strawberry powder for every one cup of royal icing. You can dissolve the powder in one to two tablespoons water before you add it if you want to minimize the risk of clumps.
- Red: Add one to two teaspoons beet powder for every one cup of royal icing. Dissolve the powder in one to two tablespoons water before you add it if you want to minimize the risk of clumps.
- Orange: Add one to two teaspoons carrot powder for every one cup of royal icing. Dissolve the powder in one to two tablespoons water before you add it if you want to minimize the risk of clumps.
- Yellow: Bring one cup of water and about 1/8 teaspoon (one small pinch) saffron threads to a simmer over medium heat. Remove the mixture from the heat, and let steep for 15 minutes. Strain, then return the mixture to the pot. Reduce to three to four tablespoons, then transfer to a small jar to cool completely. Add 1/2 to one teaspoon yellow color for every one cup of royal icing.
- Green: Add one to two teaspoons matcha for every one cup royal icing, dissolving the powder in one to two tablespoons water before you add it if you like.
- Blue: Combine two cups shredded red cabbage and 1 1/2 cups water in a small pot. Bring the mixture to a simmer over medium heat. Remove the mixture from the heat, and let steep for 15 minutes. Strain, then return the mixture to the pot. Reduce to three to four tablespoons, then stir in a small pinch of baking soda — this will turn the color from purple to blue! Transfer to a jar to cool completely. Add 1/2 to one teaspoon blue color for every one cup of royal icing.
- Purple: Combine two cups blueberries and 1/4 cup water in a small pot. Bring the mixture to a simmer over medium heat. Simmer until the berries burst and begin to break down. Use a potato masher to mash the berries, then strain the liquid, discarding the solids. Return the juice to the pot and bring back to a simmer. Reduce to 1/4 cup, then transfer to a jar to cool completely. Add 1/2 to one teaspoon purple color to one cup of royal icing.
Food52/Mark Weinberg