 Photo: Whitney BrownWhat is it about the flicker of a flame, the crackle of burning wood, and the wafting clouds of wood smoke that enchant us so? Combine an outdoor fire with a spring breeze dancing on one’s skin and the sound of leaves rustling in the trees, and merriment abounds. The effect is liberating; the appeal is elemental.
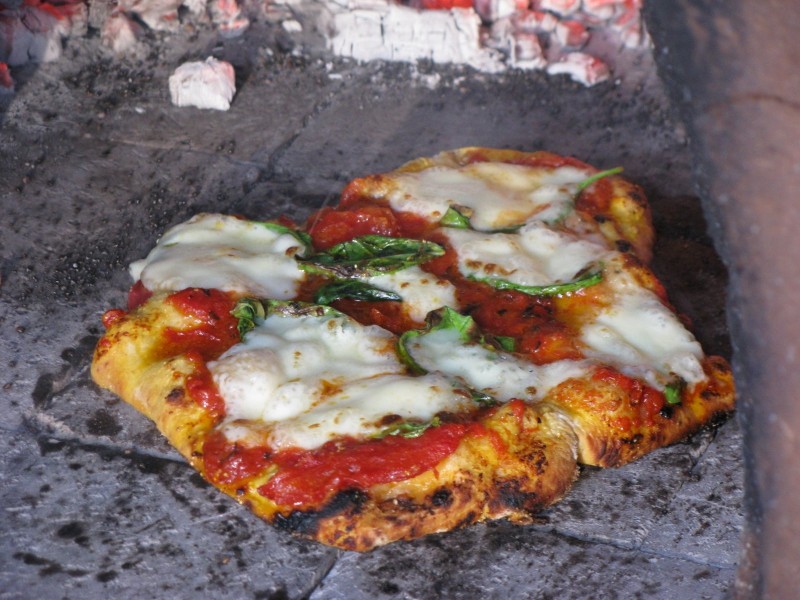
Add delicious, smoke-kissed food, and you have a wholly sensory experience. All of my favorite food experiences take place outdoor over a hardwood fire: oyster roasts, hickory-smoked barbecue, and wood-fired pizza. I have come to believe that my happiness and well-being is dependent on my ability to gaze up into a tree canopy while sharing a fire, a meal, and maybe a song, with friends.
Perhaps that explains why the first thing Phil and I did when we bought our first home six years ago, was build an earthen oven in the backyard. We had just found out that we had three small hickory trees on our property that had been damaged by lightening and would have to come down. I knew we couldn’t let the wood from our dead trees go to waste so we stacked it up into a grand woodpile and went to work. We turned clay, sand, and straw into a beautiful and effective oven, following the instructions of Kinko Denzer’s Build Your Own Earth Oven.
The egalitarian nature and the organic forms of earthen, or cob, building had fascinated me for years before we broke ground on our oven. It requires no great skill, expense, or tools. Even children can participate mixing the mud mixture and sculpting it into place. The technology is ancient, and mud is still the most common building material in the world today. Perhaps best of all, this type of building is completely non-toxic, can be sourced from your own yard, and is completely recyclable.
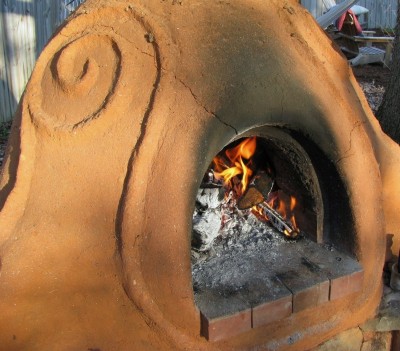 The magic of mud and wood: a backyard earthen pizza oven heats upPhoto: Whitney BrownOur resulting oven might not have all the bells and whistles of the $20,000 outdoor kitchens featured in glossy food magazines, but for less than $200 and a little sweat, I think we built something far more magical. In the years since building our oven, we have gotten so attached to our backyard pizza parties that I cannot imagine ever being without them. These primordial traditions of fire, earthen building, and basic flour and water cooking bolster our connection to both the past and to each other.
Perhaps building an earthen oven is not for everyone, but I am sure most of you have a grill that you can fire up for making pizzas. Even if you just want to use your home oven equipped with a pizza stone, pizza is a great way to please everyone, let those who want to pitch in, and adapt your toppings to the seasons. If you’d like to host a pizza party, here are a few tips to help things go smoothly. The key is good planning and good fundamentals.
- First you’ll need a good pizza dough and pizza sauce (recipes below). You can purchase dough from your neighborhood pizzeria if you are intimidated by making yeasted dough, but I encourage you to give it a try. It’s really quite easy once you’ve done it a couple of times.
- You’ll need a very hot fire so be sure someone has started the fire on the grill or oven a good two hours before you are ready to start cooking. If using a pizza stone in a home oven, preheat the stone at 500 degrees F for one hour before you begin.
- Assemble a few useful tools–a pizza peel or an improvised canoe paddle, long handled tongs, and a rolling pin.
- Take a tip from celebrity chefs and assemble mis en place, a French term referring to having all your ingredients prepped–peeled, sliced, diced, grated, sautéed–ahead of time in order to make cooking easier. That way not only is pizza making easy for you in the heat of the moment, but also the system is very user friendly for your guest to take their turn as pizza maestro as well.
- Keep your crowd small, at least until you get the hang of things.
- Assemble a prep table where pizzas can be rolled out and topped, as well as another table where the pizza can be cut and served. These should be no more than a few steps away from where you are cooking the pizzas.
- Assemble chairs and groups of small card tables around the pizza oven or grill because that is where people will want to be. For years, we tried to cook pizzas and then gather everyone at a table on the other side of the garden for a sit-down dinner, and it never worked. We had much more success once we relented and just enjoyed the pizzas, one by one, as they came out of the oven.
- Be patient, relent the day to the processes of fire building, prepping and cooking, and enjoy it.
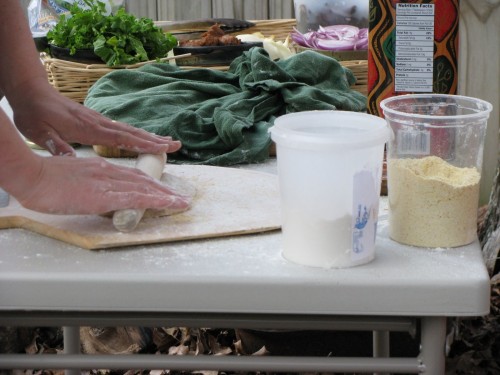 Get it together: a pizza party mis en placePhoto: Whitney BrownPerfect Pizza Dough
This is my favorite dough for making pizza. I like to make it a day ahead and place it in the refrigerator overnight to rise slowly. Then on the day I make pizzas I can concentrate on assembling my toppings and building the fire. When I make the dough I like to use part all-purpose and part bread flour, as well as a little whole-wheat flour for flavor and texture. You can use even more whole wheat flour, you just might need to add a bit more water as well.
Sponge:
1 ½ cups warm water (105-115 degrees F)
2 cups unbleached all-purpose or bread flour
2 ¼ teaspoons (1 package) active dry yeast
2 teaspoons honey (optional)
Dough:
Sponge
3 Tablespoons extra virgin olive oil
2 teaspoons fine sea salt OR 3 teaspoons of kosher salt
1 cup whole wheat flour
2 cups all purpose or bread flour
To make the sponge, sprinkle the yeast over the water in a large mixing bowl, whisk it in, and let stand until creamy, about 10 minutes. Stir in the honey and then the flour. Cover tightly with plastic wrap and let rise until very bubbly and doubled in bulk, 1-1 ½ hours.
To make the dough, stir olive oil and salt into the sponge with a wooden spoon and mix well. Whisk in 1 cup of the whole wheat flour; stir in the remaining flour, 1/2 cup at a time, and mix until the dough is well blended and just slightly sticky. You may not need the last ½ cup of flour. Cover the dough and let it rest for 5 minutes. Then knead the dough on a lightly floured surface until soft and velvety, about 10 minutes.
First rise: Place the dough in a lightly oiled container, cover it tightly with plastic wrap, and let rise until doubled, about 1 1/4 hours or preferably overnight in the refrigerator.
Shaping and second rise: If you refrigerated your dough, remove it from the refrigerator about 2 hours before you wish to use it. Divide the dough into 4 equal pieces and shape them into balls. Rub each of the balls of dough with olive oil, place them on a parchment lined sheet pan, and cover with a clean towel.
When your oven or grill is hot, roll out 1 piece of dough on a well-floured counter or use your knuckles to gently stretch out the pizza dough. Don’t worry if you don’t get a perfect circle. That is part of the charm.
My Favorite Five-Minute Tomato Sauce for Pizza
I make a basic tomato sauce in late summer with fresh paste tomatoes and can it for use all year long. For this one, I turn to store-bought canned tomatoes. I prefer whole plum tomatoes, such as the Fire Roasted Muir Glen brand, or the prized San Marzanos.
1/4 cup extra virgin olive oil
1 28-ounce can whole tomatoes
1 teaspoon fine grained sea salt
1 small sprig of fresh marjoram, oregano or a few leaves of basil
1 ½ teaspoons crushed red chili flakes
2 cloves very fresh garlic, grated
2 teaspoons red wine vinegar
In a wide saucepan heat the olive oil over medium high heat until hot but not smoking. Pour in the can of tomatoes and crush them with your fingers or the back of a wooden spoon. Add the salt, the fresh herbs, and the chili flake and cook over medium high heat until much of the excess moisture has evaporated, about 3 minutes. Add the raw, grated garlic and cook another two minutes. Add the red wine vinegar and remove from heat. Discard the herbs. Taste and add more salt or chili flakes if you like. Cool before using as a pizza topping.
Pizza Toppings for Late Spring
These toppings are just to give you an idea of a starting point. Choose your own favorites. Just remember to start with either an olive oil brushed crust or tomato sauce. Use toppings sparingly so that your crust does not get soggy. Place each topping in a small bowl of its own. Pre-cook the bacon, sausage, greens, mushrooms, caramelized onions, and any topping you choose that will not cook very quickly. For quick cooking greens like dandelion, I just toss them in a bit of olive oil and salt and pepper before throwing them on a pizza.
- Caramelized spring onions, oil cured olives, and anchovies
- Bacon, radicchio, crushed garlic, chili flake, and fresh mozzarella
- Sauteed rapini or dandelion greens, Italian sausage, young red onion slivers, and mozzarella
- Sauteed wild mushrooms and smoked goat cheese
- Classic Margherita — fresh tomatoes or tomato sauce, basil, and fresh mozzarella
In the Oven
If cooking the pizza in the oven, indoors or outdoors, slide the stretched or rolled-out dough onto a cornmeal or semolina dusted pizza peel and add your toppings. Be reserved with toppings and try not to get anything wet on the pizza peel or your pizza may stick. When your pizza is topped, jiggle the pizza peel to see if the pizza slides around freely. If the pizza appears to be stuck, use a spatula or bench scraper to loosen the dough from the peel and toss a bit more cornmeal under that section of the dough.
Next, slide the pizza onto the clean floor of your pizza oven or onto a baking stone in your home oven. Bake until the pizza is bubbly, and the crust is well browned. It will take as few as 3-4 minutes in a hot pizza oven or about 10 minutes in a home oven on a pizza stone.
On the Grill
For grilled pizzas, slide your rolled-out dough onto the back (bottom side) of a well-oiled sheet pan. Brush the top of the pizza with olive oil and have all the rest of your toppings ready. Things will happen fast once the pizza is on the grill so you must be ready. Keep the toppings very simple. Slide your prepared dough onto the grill over direct heat. Cook about 2 minutes, just to sear the bottom of the dough. After 1 minute, lift up the edge of the dough to be sure you aren’t burning it. If you are, move the dough to a cooler spot on the grill.
When the underside of the dough is seared, flip it with a pair of long-handled tongs. Immediately brush the top with olive oil and add your toppings. You will most likely need to close the grill to cook the top of the pizza. When the toppings are bubbly and the cheese is beginning to brown, the pizza is done. Transfer to a cutting board and serve.