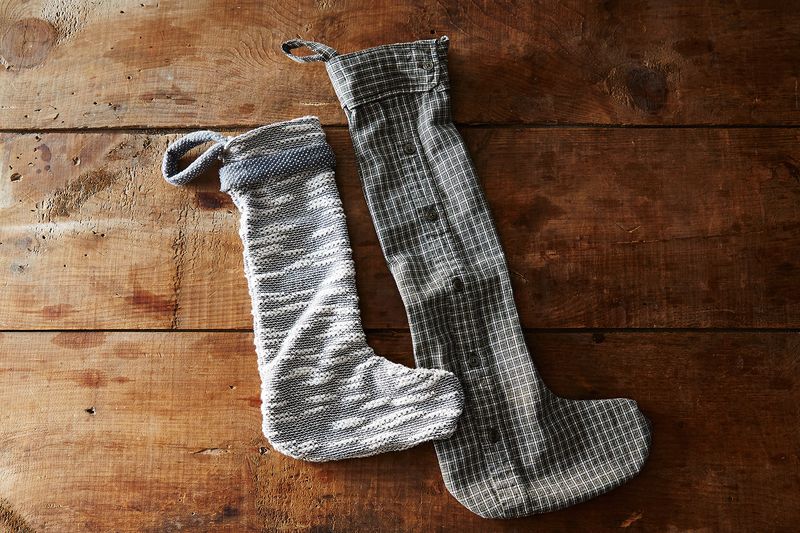
If baby Jesus was born in a stable, I will bet you a bottle of frankincense that his swaddling clothes were from a thrift store, and you know all of the other style-conscious, pregnant teens were pinning Mary’s upcycled manger-as-crib on their “Farm Animal Nursery” boards. You too can join in this great tradition of holiday DIY thriftiness by crafting stockings out of old sweaters and flannel shirts.
Incorporating these worn objects into your holiday decor is inexpensive, easy, and adds a layer of cozy to your mantle. Each stocking has the opportunity to be as unique as its owner, and below are several different variations on the instructions, so you can choose your own adventure.
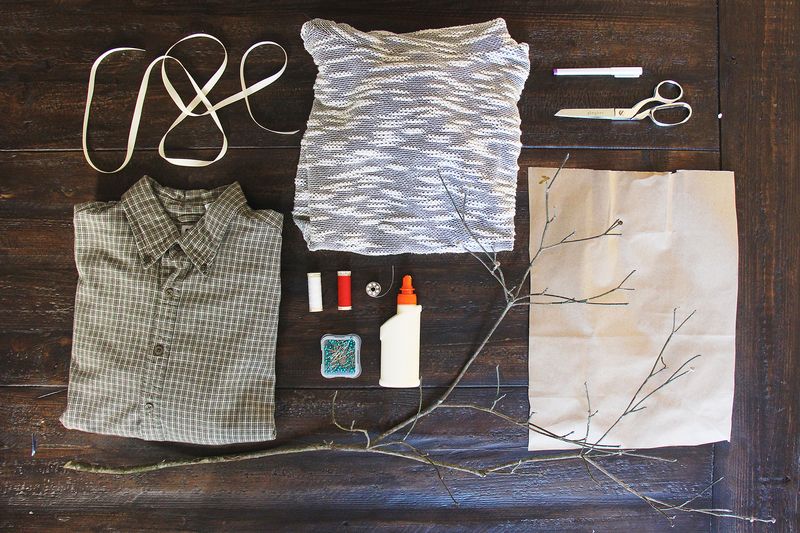
What you will need:
- Old sweater and/or flannel shirt
- Sewing machine (or a needle and thread if you’re really ambitious)
- Kraft paper or wrapping paper, for pattern
- Pins
- Marker
- Iron
- Branch (for display, optional)
- Ribbon (optional)
- Glue (optional)
- Nails (optional)
Food52 / Annie Colquitt
1. Choose your garments.
’Tis the season of second chances, and with this project you can give new life to your beloved sweater that mysteriously shrunk in the wash or to a favorite flannel shirt that developed a small hole. If you don’t have anything on hand, head to the thrift store and rescue an outcast sweater or shirt. Look for garments with interesting details like pockets, buttons, or a chunky cable knit. Bonus points if you find a detail that can make an interesting cuff for the stocking, like ribbing at the bottom of a sweater.

Food52 / Annie Colquitt
2. Make your pattern.
There are millions of printable stocking patterns online (OK, about 606,000), but the best results will come from studying the unique details of your garment and creating your own pattern. Consider placement of buttons and pockets. Because seaming up a knit can be tricky, take advantage of one of the finished ends of a sweater for the top edge of the stocking (see above).
With a flannel shirt, consider incorporating the collar or detaching the cuff of the sleeve to attach as a cuff of the stocking. Even with no drawing skills, you can sketch out a basic stocking shape. (I believe in you.) If you are making more than one stocking, I recommend making a separate pattern for each stocking. A variety of shapes and sizes adds visual interest and can reflect the different personalities of the stockings’ owners.
3. Cut and sew.
Turn your garment inside out and position your pattern on the shirt or sweater. Pin the pattern down.
If you are working with a sweater …
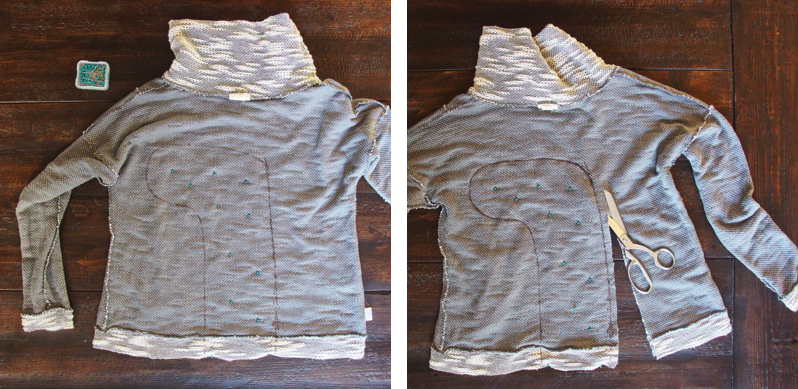
Sewing the shape before cutting it out will prevent unraveling.Food52 / Annie Colquitt
I recommend tracing the pattern onto the sweater, pinning the front and back of the sweater together along the traced line, and then sewing over your traced line. Leave the top of the stocking along the finished edge of the sweater open for Santa’s treats. By sewing before you cut the sweater, you avoid unraveling the sweater as you work with cut pieces. Once your seam is in place, cut out the stocking approximately 1/4-inch around your sewn line.
If you are working with flannel …
Go ahead and cut out the front and back pieces of your stocking before you begin sewing. Your first step should be to finish the top edge of the stocking. Here are three different methods you can use.
1. If you are using an edge that was already finished in the original garment, congratulations, you get to skip this step.
2. For the next simplest stocking, create a folded top edge. Fold the top edge of the front of the stocking down by about 1/8-inch and iron flat, then fold that ironed edge another 1/8-inch down — so you can no longer see the raw edge — and iron this fold again. Pin down the folded edge and sew across to secure, taking care not to sew the opening of the stocking shut. Repeat for the back side of the stocking.
3. To incorporate the cuff of the sleeve as the top cuff of the stocking, first cut the cuffs off each sleeve about an inch above the finished seam of the cuff. Set the back side of the stocking aside; you’ll be sewing the cuff just to the front piece.
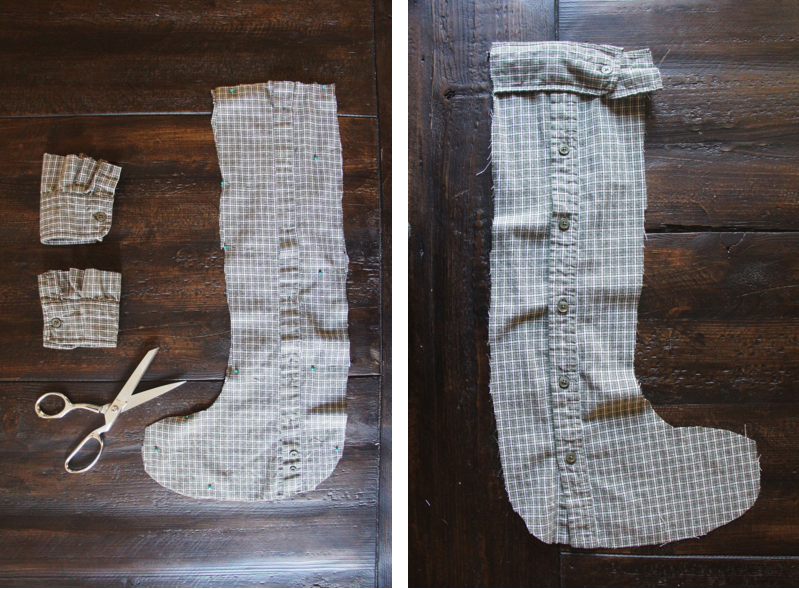
Left: where you’re starting; right: where you’re headed.Food52 / Annie Colquitt
Now, position the cuff so the button is where you want it (I chose to put mine two-thirds of the way across) with the finished edge of the cuff toward the toe of the stocking. Cut the cuff open on the back side so the outer part lays flat across the top of the stocking — this is roughly the way it will lay when you’re finished. Keeping the cuff positioned this way, move it under the stocking piece so the raw edges touch at the top. Pin the pieces together; the back side of the stocking piece will be making contact with the front side of the cuff (below).
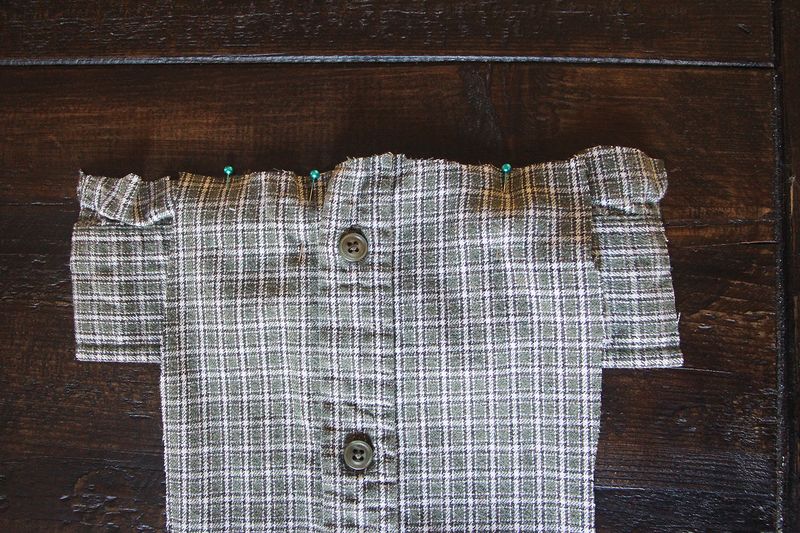
The cuff, positioned under the top of the stocking, before sewing.Food52 / Annie Colquitt
Check your positioning by folding the cuff over the front of the stocking at the pinned seam — it should now be laying down on the stocking with its good side showing, as it will be in the finished product (below). Flip it back before proceeding.
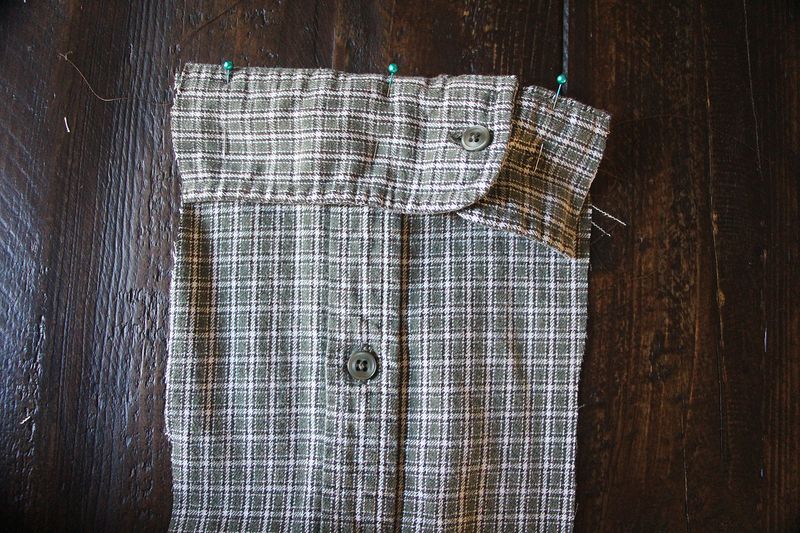
How the cuff will look once you’ve sewn it onto the top of the stocking.Food52 / Annie Colquitt
If everything is lined up where you want it, sew across the two pieces about 1/2-inch above the seam of the cuff. Trim the excess fabric from this edge, which will be covered by the cuff in the finished stocking. Now, fold the cuff over the seam and iron flat — so that the edge of the cuff is now the top of the stocking (hooray!) — and pin in place. Sew across the top and bottom of the cuff to hold it in place, ideally sewing along a seam of the original shirt so that your stitching is less noticeable. Trim the sides of the cuff so it’s even with the edges of the stocking. Repeat this process with the other cuff on the back of the stocking, if desired.
Now that the top edge of your flannel stocking is finished, pin the front and back pieces of the stocking together with the outsides touching; the finished tops should be perfectly even and the feet lined up. Sew the sides of the stocking together, leaving the top open for Santa’s coal. (You may want to cut small notches along the curves of the toe and heal of your stocking to make for a smoother seam.) Once your shape is sewn, cut away the frayed edges close to the seam — but not all the way up to the seam — so that there will be less bunching when you turn the stocking right side out.
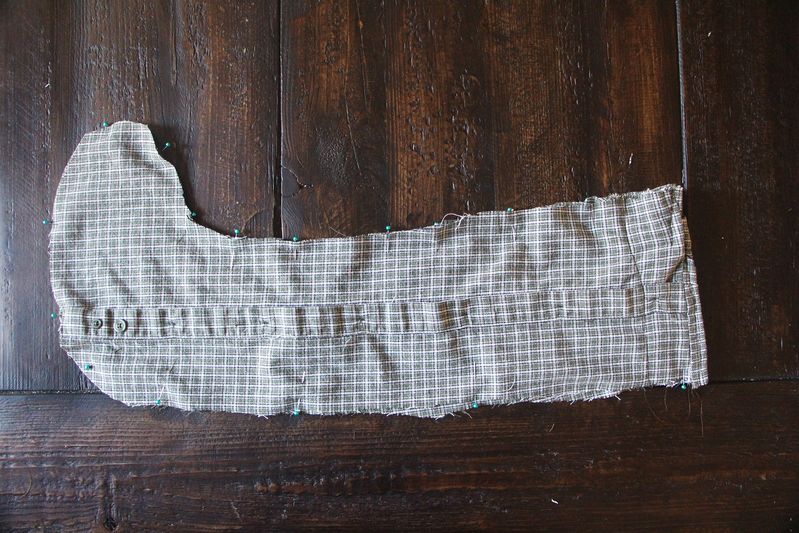
To sew the two stocking sides together, first pin them inside out.Food52 / Annie Colquitt
4) Finishing touches.
Whether you are working with a knit or flannel, we should all be back to the same step now. Go ahead and turn your stocking right side out. Ta-da! Take a moment to bask in your glory — now back to work. You need a loop to hang your stocking. You can sew a small loop of ribbon in a coordinating color or you can create your own ribbon by sewing together two strips of extra material and then turning the strips inside out to hide the seam. Sew your loop into the inside edge of your stocking.
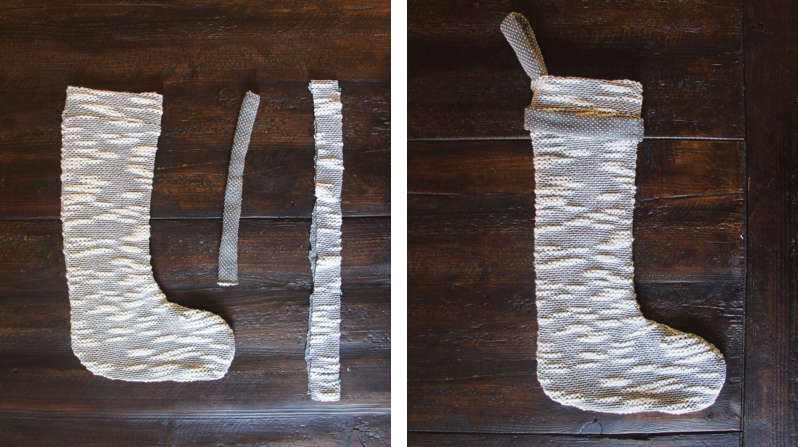
What’s a stocking without a loop? A very large, useless sock.Food52 / Annie Colquitt
5) Hang by the chimney with care.
For a rustic alternative to stocking hooks, head outside and look for a branch with enough twigs reaching out to hold your household’s stockings. If you live in a city that collects yard waste along the road, pick-up day is the perfect opportunity to go scavenging. If you don’t, well, try not to break any laws.
Bring your branch indoors and trim off any excess twigs that get in the way of hanging. Tie some ribbon (store-bought or made from your remaining fabric) around the ends of the branch and secure with a strong glue. Secure your branch to your mantle by tying the ribbons to nails or heavy objects on your mantle.
If you are one of the millions of Americans tragically living without a fireplace in your home, hang your branch on a wall, place your laptop underneath, find a YouTube video of a fire, and enjoy.

Food52 / Annie Colquitt

